Tuesday 30 April 2013

Bird ID please

My daughter works in a local DIY store and she recently spotted 3 Bamboo plants in the skip along with all the other rubbish that gets chucked in there.
Knowing that I would likely take any free plant regardless of how dead they look and try to revitalise them she got permission to delve into that skip and pull those bamboos out. I have to admit all 3 of them do look dead and definitely wouldn't sell to the public but I'm one for giving things a go because you never know just how much life they have left in them.
The Bamboo are Golden Bamboo and are about 10ft tall and very well established, each pot would sell at £40 each (they still had labels on) so the main problem was going to be getting them home as we'd only arrived in a car. We squished them in though and to passing motorists we must have looked a weird sight, my daughter and I were completely hidden by dead foliage.
Once we got them home it was late so I stuck each rootball in a bucket, filled it with water and left them to soak overnight - I actually hope think that the reason the plants looked so dead was because a) they'd been exposed to harsh winds and b) they hadn't been watered in a while, but the culms all looked well green and were still very sappy.
The next day I potted each one up into bigger buckets in homemade compost (garden top soil, compost, manure and grit) and mixed in a handful of Blood, fish and bonemeal to each one, watered them in well and cut a couple of feet from the tops because they're too big for the polytunnel otherwise.


If the culms weren't so green and sappy I may have thought it a hopeless case but there's even tiny little buds coming through the culms so I'm keeping fingers crossed. If they show signs of revival they'll get potted up again next year into huge tubs - they just will not survive the winter here outside.

I managed to snap a piccie of this little bird today and would love to know what it is (I'm thinking some kind of Bunting?) so if any of you know please comment below.


Although I've been busy out in the garden today there hasn't been any significant change so I thought I'd pop in some photos here to bring some brightness to the page (plus we all need to see what we can look forward to when summer finally arrives)


Sunday 28 April 2013

What inspired you?

For this post I am taking part in a competition run by Sue Garret of  'Our plot at Green Lane Allotments'   to win a 'Landman outdoor firepit' courtesy of 'Select Furnishings' a company that sells outdoor furniture from Dining sets, loungers and day beds to all the accessories you need to make your garden an all year round attraction.

The idea behind this competition is to write a blog post about what inspired your interest in gardening.
Apologies in advance for a longer than usual post but once I got going I couldn't stop. 


I've come to the conclusion that my "love" of all things gardening began as a tiny seed set before I was born. Over the years throughout my childhood and adolescent years various gardening encounters gradually fed that little seed until eventually today in my middle age years it has grown into this beautiful bloom.


My first memory of a gardening experience is me as a toddler sitting in a Silver cross type pram watching my dad dig over our RAF garden, when my father left the RAF we moved to Nottinghamshire and our home included a very large back garden which I remember being full of large leaved cabbages and potatoes. My sister and I would spend a lot of time picking the caterpillars of those cabbages and when the time came for the garden remnants to be removed each year we would both help my dad load up the wheelbarrow and walk them up to the landfill. I remember the incentive for this otherwise boring task was the ride back in the wheelbarrow, so much fun at that age. Actually it's still fun now!

My own first real plant came about when I was about 10, I saved a tree from a local area that had just been planted near a huge lake and bought it home for our garden. My parents had no idea what the tree was or how I had come about acquiring it but they planted it amid my excitement. That tree grew and grew and grew until eventually it topped out at about 35ft, it still stands in the back garden of my childhood home as a testament of a childhood once enjoyed there and although my mum had to move from the house recently that tree remains and while it does a piece of me will always be there too.

A love for flowers began the first time I received a bouquet from my boyfriend (now husband) when I was 17 years old. I can still remember the feeling when that bouquet of Roses and Lilies arrived when I was poorly, they lifted my spirits and made me feel completely loved, I suspect that is why even now Roses and Lilies are my favourite flowers of all time.


When we married our first garden was a small square block and we literally just mowed the lawn, we had young twin girls by then and so I had no time to worry about the state of the garden but eventually we moved to a bigger house in Lincolnshire with a much bigger garden and that is where I started to dabble with plants, digging borders and building whatever I needed for the garden.
I remember the astonishment of my neighbours as they saw a young girl laying heavy paving slabs out the front with block edging to create a driveway. My husband is a builder and worked 7 days a weeks so if I wanted these things doing or making I figured I was just as capable as anyone else of learning how to do them.

The Lincolnshire garden is where I really began to garden with flowers as opposed to just a lawn, I grew Evening primrose, Lavender, Hebe that I trained as standards, heaps of Fuchsias and any colourful blowsy plant that I could get my hands on. I remember each spring checking for the new growth of a particular Dahlia and when the blooms of 'Bishop of Llandaff' were at their most blowsy, I felt summer had really arrived.

When we got the opportunity to purchase a property in Caithness with 4 acres of land I was beyond excited - 4 acres meant a huge garden.
I had a rude awakening by about the 3rd year of living here though, most of the plants I bought up from England had died due to the weather conditions and exposure we have here and I was suddenly faced with the fact that I had to learn how to garden all over again. I also realised that patience and perseverance were going to have to become my middle name if I was going to have any kind of garden.
Gone were the days when I could buy any plant that I liked and be pretty sure that it would survive wherever I put it.
Gone were the blowsy flower days too - my precious 'Bishop of Llandaff' had succumbed to the weather.

 A new style of gardening was needed but it was still another couple of years before I finally admitted that I was wasting time and money by planting what I wanted rather than what was suitable for the climate and garden conditions.
This garden is where I had my first experience of growing a lawn from seed too. My husband and I purchased what we thought was a big enough bag of seed and I excitedly scattered it over the soil that I had diligently leveled and flattened myself. We checked on that lawn daily and after a few weeks of scrutinizing it from all angles we still could not see one germinated seed. With some disappointment I stomped off to grab the empty seed bag and return it to the shop only to find out that what we had bought - and what we had been  waiting to grow - was actually lawn feed not lawn seed. Such a ridiculous mistake to make and one that won't be repeated!

The garden as it stands today is still far from finished, in fact we have just started landscaping a whole new vision.


Rather than a huge expanse of grass surrounded by borders we are creating rooms in our 'L' shaped garden with the intention of each 'room' to have it's own purpose. A patio is one 'room', a pond area will be another room and a fire pit area will be another room and all this landscaping has to incorporate 2 large aviaries that house Eagle owls and a Barn owl.
With my thriftiness and determination to create a beautiful garden in an exposed coastal area that barely gets above 65 degrees ever (and another reason we are incorporating a fire pit) I am propagating all the plants to be used myself.
With windbreak in place and creating sheltered areas I am finally able to grow the plants I thought I never could such as Potentilla 'Monsieur Roubillard', Lavender, Camelia, Fuschia and even Lillies outside.


But the real boon for me along this gardening journey is the ability to grow what we eat. Growing and tending to flowers and shrubs is amazing by itself but to be able put food on the table that is freshly picked, has not travelled hundreds of miles by land or air and whose only carbon footprint is that of mine as I walk it to the house from the vegetable patch is an amazingly satisfying achievement and one I hope to pass on to my grandchildren in the years to come.

I'd like to thank 'Sue Garret' for hosting this competition and for 'Select Furnishings' for offering such an amazing prize.

Saturday 27 April 2013

Manure and worms, what could be better!

I have decided to stop whinging about the weather! I've come to the conclusion that it is what it is, I have no control over it so  I just need to work with it.
What made me come to that conclusion? Well, yet again today I watched the weather forecast on TV and planned my day accordingly. It wasn't supposed to be terribly warm today but we were assured of a dry day with a little breeze, this means conditions would be perfect for me to get out and dig some more of that clay soil over after last nights downpour. With the washing loaded onto the line outside I donned the boots and got ready. As soon as I got outside the heavens opened and we got hit with hail stones! I sheltered in the greenhouse and fed the birds while I waited for it to pass and waited and waited and waited. Looks like today is cold, windy and chucking hail stones at us - I give up caring!

Anyways yesterday (another day similar to today) I got my daughter out of her pit at 6am to come running with me (didn't go down too well) and after our brisk exercise I roped her into coming with me to get a trailer load of manure - yes, I finally get some of those worms.


One trailer load of that went nowhere so today Mr TG roped in my daughter and her boyfriend (at 7am lmao) and we took his 14ft trailer and filled it to the gunnels with manure, should be enough for quite a while and as an added surprise I'm pulling out all sorts of bulbs from it at the moment, mainly Daffs and Tulips but it's gonna be exciting to see them next year.
The manure is extremely well rotted as it's been in a heap for a few years so I delved in with gloved hands and started pulling out those worms. To be honest I haven't a clue what makes one worm different from another but apparently the common garden worm is no good because it can't stand the conditions of a wormery - I needed specific worms. So assuming the worms found in that muck are the correct worms I got my wormery going.
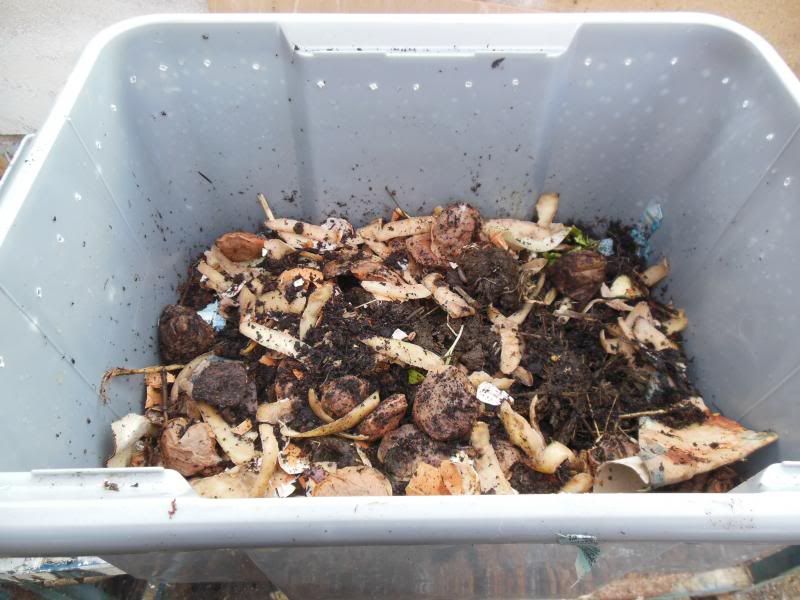
I've read many wormery articles on the net and all the different advice got mushed up in my already mushed up brain so I figured I'll do what I think is right and I'll soon learn if it's not. With that in mind I lay damp cardboard on the bottom of the middle bin, added damp shredded paper followed by a little garden compost then the worms then some kitchen scraps and finally damp cardboard to keep the little critters underneath and working away all topped off with the lid.
Here's the inside before the cardboard top layer


I'll let you know how it goes.

Onto a more exciting note the Silkie hen is sitting on eggs for the first time this year. Silkies make fabulous brooders and it's all this one seems to want to do. We've had a few chicks hatch but because we've left the rearing to the hen only 2 have survived past a few days old and even those 2 came close to death once. This time we'll let her sit on them and hatch them but then we'll take them and rear them.
Silkies really don't have much interest to me because they're more a pretty bird than anything else and their eggs are pretty pathetic, but we'll sell the chicks once they're old enough and then next time she gets broody I'm going to swap her eggs for some of the laying hens eggs and see if she's successful at hatching them. Granted the chicks will have a Silkie father but I'm hoping that's as far as the resemblance goes - I have no idea about these things.


She will not move off those eggs for anything!


Wednesday 24 April 2013

Plants a'thrivin

 "Climate is what we expect, weather is what we get" - Mark Twain


Yet again the weather has shortened my day out in the garden, rain doesn't bother me so much but I just cannot stand wind, especially a cold one. Of all the things that is 100% guaranteed to have me legging it back indoors it's the wind, I don't know what it is that I hate about it (other than earache of course) but it even ruins any time spent in the polytunnel and greenhouse due to the flapping polythene or the greenhouse plastic roof making a racket - I hate it.
However, before I let it send me back indoors today I did wander to the polytunnel and quickly take some photos of the plants that are doing so well in there at the moment. These are all plants that I'm hoping to get planted out this year but the ground doesn't look like it will be ready for them until next year.


Aucuba Japonica - You gotta love those spotty dotty leaves.


Polemonium 'Stairway to Heaven' - First one of these I've ever had and I'm amazed by the pink tinge to the leaves. I can't wait for the flowers to open.


Heuchera 'Midnight Rose' - I have other Heucheras planted out but I love the deep purple of these leaves. It'll look amazing planted with something very green like the Fatsia in the background.


Hosta 'Golden Tiara' - Look at those leaves. I took a photo of this particular Hosta because the slugs really reeeeeeally like this plant and it may not look good for very long. The other half of this Hosta was planted in another tub and that one is actually throwing up flower stems.


I just had to take a picture of this jug that I grow sempervivums(?) in. I bought the jug as one of those jug and wash bowl sets from a car boot years ago because I love the Blue Iris but I broke the bowl and so figured I'd have to grow something in the jug instead of leaving it in the bathroom looking all pathetic by itself.

Trachycarpus Fortunai - I initially tried to grow this outside but a summer wind or two obliterated the leaves so for the last year I've kept it in the polytunnel and those leaves are all renewed and gorgeous looking.


Sharing this post with 'A Southern Daydreamer - Outdoor Wdnesday'

Tuesday 23 April 2013

Brrrrrrr!

The weather here yesterday was nothing short of chuffing freezing! A cold wind was blowing in along with sporadic bursts of rain. When is this weather going to finally become a little more predictable? Luckily I hadn't put some of my plants in the polytunnel outside to begin hardening off because that wind would have ripped right through them, I think I'm looking at at least another month before we can trust the daytime weather here not to kill our young veg plants.

I sowed Leeks (Mussleburgh) a while ago and they've been really slow to get going this year, I know they'll grow rapidly from now on though so I guess I better decide where I'm going to plant them. For some reason this year I have not even made a planting plan for the veg, I have loads of seedlings waiting to go out and haven't even allocated them their space yet - I'm a naff veggie grower aren't I.

Not ready to go out yet but at least they're growing now.

Due to the weather I haven't managed to get stuck into more of that clay soil but I did take a picture of what I next have to 'makeover' for this landscaping plan.
I'm beginning to wonder whether this landscaping idea was one of my finer moments ...... or not!
The problem I have with that clay soil is that I have to get it dug over before summer because I will have no hope of even getting a fork 2" in if I don't. Luckily the clay soil appears to be contained to the foundation areas of the house, the rest looks like it will be pretty good.

Look at all the stones and rocks I have to move before I even begin to turn it over. Eek!

During the clear up I did find this rather neglected Black bamboo. Now some would say it looks dead - me included - but I'll hang on to it and see if resprouts.

Not looking too hopeful I admit.

I hope the spring weather is warming up wherever you are.

Saturday 20 April 2013

Oh no, it's clay!

I made a start today creating the new flower beds for the garden and let me tell you this is not going to be easy to accomplish. The first area I'm doing was covered with gravel on top of carpet and carpet underlay and I had to shovel all that gravel off first. The problem is I never do things the easy way and I'd made such a mess around the garden that I couldn't get the wheelbarrow to the area so I had to hand trowel the gravel into a trug and then cart the trug to the patio to deposit the gravel. 100 trips later and I'd finally got rid of the gravel!
The underlay came up quite easy as did the carpet and I was quite excited to inspect the soil beneath assuming it was going to be half decent, well it wasn't


What you're looking at there is compacted clay. I saw a few areas of darker looking material and had hoped that it may indicate all was not as bad as it first appeared so I started test digging


Nope, it's definitely as bad as I had feared. That soil was a pain to dig and exceptionally difficult to break down, not only that but in the first 4ft x 2ft look at what came out of it


And that was just the ones I got going down a forks depth.
I've never had to work with clay soil before so this is going to be a learning curve for me but I do understand the pro's and cons of this type of soil:

Pros's
  1. Retains moisture.
  2. Tends to be nutrient rich.
Cons
  1. Slow to warm up in spring.
  2. Compacts easily.
  3. Drains slow.
  4. Tends to heave in the winter.
I'm going to have to really work some manure into this, the good thing about that is I will also get the worms I need for my wormery - yay I don't have to buy any after all.
I'll also incorporate some grit and then I'm going to be barrowing plenty of top soil over from the polytunnel, hopefully in a couple of years I'll have some decent soil going on here.

On the upside my pallet wood fence has worked at keeping the dogs out - so far.
Mr TG hasn't taken pity on me yet and offered to replace it, he did however offer to furnish me with various colours of paint so I could paint it rainbow colours. Yes, he was being sarcastic! His only actual input to the fence was "Yep you're right, those pallet fences do look good". Sarcasm again Mr TG.
I did have to offer Huntly a bribe to make him feel his half of the garden was the place to be, he's lost his table top from where he watches the golfers so I offered him a little more luxury


Yup he's quite happy.
Atlas on the other hand is much happier here


6.30am, it's freezing and he wants to swim!


Friday 19 April 2013

A....erm....pallet wood monstrosity.....

Today I built the perfect example of everything Mr TG hates and loathes about a DIYer getting their mitts on pallets - the pallet fence!
I hear your cries that pallets make excellent fencing and I myself agree, however NOT the way I built one.
I'm not the most patient of people I'll admit and as I often say I don't work from a plan either so alot of my projects are doomed from the start. However I had put a little thought into this one, well as far as deciding what I was going to make the fence with anyway, the fact that I didn't have anywhere near enough windbreak netting put plan a in the bin.
Plan b came to me as I was scouring around looking for suitable fencing materials. My eagle eyes settled on Mr TGs quicklock scaffolding, well he has plenty of it so I figured he wouldn't miss what I needed. Problem was how was I going to secure the scaffold panel to the ground because a) I couldn't be bothered with hammering stakes into the ground b) I didn't have any stakes less than 9ft anyways and c) this thing is supposed to be temporary (well it's now definitely gonna be that cos one wind will probably take this thing down).
I finally decided to hammer the legs of each panel into the ground - cool huh! With that done I sat back and looked at my new fencing and realised two things a) The fencing was now so low that the Great Dane could easily step over it and b) the height didn't matter because the dogs could get through the gaps in the panel anyway.
See, this is what happens when you don't plan Linda!
Next brainwave should have been to take it all down and forget it but no, not me, I stick pallets in front of it instead and as if that wasn't bad enough I tied the pallets to the scaffold with bright blue twine.
This is so not what I had in mind but here is the finished disaster result

How not to make a pallet wood fence

Atrocious isn't it. I so didn't have this in mind when we decided to start landscaping the garden.
And all because these boys keep demolishing my garden and plants. Going to have to have a permanent area sorted for them soon though because we need to be landscaping the half of the garden they're now banished to. Would you believe these guys have 4 acres they can destroy other than my garden........

Atlas & Huntly, the reason my garden is a mess and now sports a naff fence.

As if the front view wasn't bad enough here's the back view and what I have the pleasure of seeing whenever I work out there

Oh the shame!

I'm hoping that Mr TG will either hate it or take pity on me and help me sort something else out because I just cannot work with that lol.

On another note, I inspected the veg beds and garden beds round at the polytunnel today and one of the first things popping through is this

Garden thug - Horsetail

Grrrrrrrrr! Blinkin Horse tail. This stuff is the bane of my life round the polytunnel area because the ground is boggy near the pond and this stuff thrives there. I have never come across such a rampant, tenacious impossible to kill weed in all my life. I could ignore it if it stuck tot he pond edges but it comes up through the veg beds, the flower beds and even in the polytunnel.
I hate this stuff!

Wednesday 17 April 2013

The Black Dog

I decided to head straight for the garden this morning, no detouring to the greenhouse or polytunnel because then I'd get sidetracked and end up still not clearing up the first bit of landscaping we started days ago.
I dutifully moved those turfs from digging out new borders (well I turned em upside down and put them in the empty beds anyway) and then set about clearing the grass of stones and then the new flower beds of stones.
I'm not the only gardener that suffers from depression (or The Black Dog as I refer to it) but I've learned  a few tricks to keep the negativity at bay that The Black Dog feeds on. If I stick to a few simple rules then The Black Dog is kept to heel, or if I'm really lucky, he'll snooze in his kennel.
One of those rules is to listen to music whenever I am alone, The Black dog hates music because I can't be thinking negative thoughts if I'm singing and the singing makes him sleep.
Anyway today I broke that rule. I was beavering away and butt dancing (you know what I mean - butt in the air as you're bent over) and I stopped to have a break, then I took the headphones out.
Maybe I would have freaked anyway at the sight of yet another brand new hole dug by my Great Dane slash JCB digger and DayLillies scattered everywhere, who knows, but it didn't stop there. I should have put the headphones back in while I filled the hole back in but I didn't! Instead I inspected the rest of the flower borders and the grass and all of a sudden.....BAM! The dog poop that was so well camouflaged inside my plants that I'd missed it during daily poop picking service really, really, really pee'd the pants off me. Then the compacted borders where the dogs keep playing really, really pee'd me off and finally the sight of damaged border plants that were attempting to finally come out cheesed me off royally and within 10 minutes The Black Dog was out his kennel and gnashing at my legs, all gnashy slathering teeth.
Suddenly I wish I had never started the landscaping and wanted nothing more to do with it.
I sulked royally!
I've lived with The Black Dog (a phrase coined by the late and great Winston Churchill) for as long as I can remember and I know how quickly it can escalate. If I don't get in there fast with some positive thinking and distraction methods to uplift my mood then I'll end up wallowing and I don't ever want to go back there.
Although the dogs had caused the damage that caused the mood change they are also a life saver in times like this. I love my dogs and would never ever take a mood out on them so even by the time I had put them away my mood had lifted somewhat.
I quickly stuffed those earphones back in, headed to the Polytunnel and stuffed my nose in the Hyacinths - how can the smell of those fail to lift any mood?


And lovely they smelled too :)
With a clearer frame of mind plans are now afoot to erect some temporary fencing to prevent the dogs accessing the area of the garden I'm currently working on. My flower beds and grass will finally get a chance to recover!
The Black Dog hates positive thinking and resolution so he's bored and is in his kennel. He's not asleep though, he has a watchful eye on me and if I slip for even a minute....................

Tuesday 16 April 2013

The Bees are finally buzzing...at least one is anyway!

I had the best surprise ever when I went into the Polytunnel yesterday - a Bee! But not just any Bee, this is the first Bee I have seen this year and I have a Pear tree and a Plum tree in there that could seriously do with some pollinating.
Shame the little guy took off from this position though and proceeded to buzz around the plastic


This is where I need the little guy to be

I did try hand pollinating as all my fruit trees are self fertile but I don't think I did a good job of it - much better if Mr Bee does it.

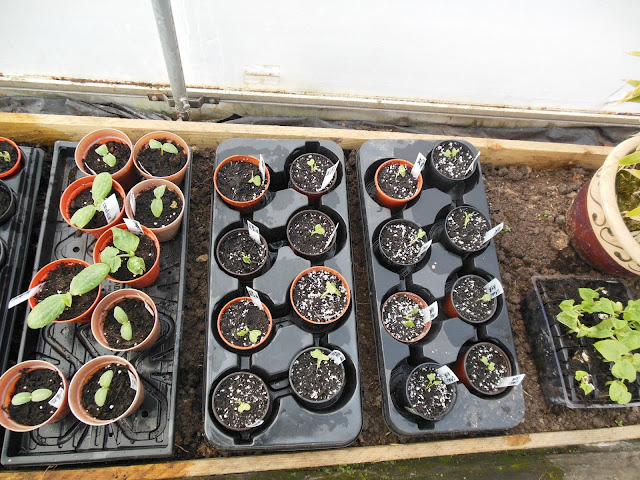
I also managed to get some of the veggies pricked out and potted up individually. It's going to be a fair few weeks before it's safe to plant these guys out though


The original Sweetcorn that I sowed died. I thought I may have been able to save them but it wasn't to be and luckily I made another sowing just in case they didn't make it, so thankfully I have more Sweetcorn on its way.
I have plenty of Cabbage (Greyhound & Golden Acre) and Cauli (All the year round) for the first sowing, I'll make another sowing in a few weeks.
The Tomatoes (Roma, Black Russian & Gardeners delight) all seem to be doing well. The Swede (Invitation), Cucumbers and Courgettes (I must post the varieties) are all romping away in the polytunnel.
I've got French beans growing too but they won't be able to go out for a few weeks neither will the Leeks.
The ground is still quite cold at the moment so I am going to have cover it with plastic to warm it up a bit so that I can get the Parsnips in.
So far I have had absolutely no success with the Celeriac sowings. I've done two seperate sowings and tried one in the heated propagator and one in the polytunnel. The propagator ones grew sporadically then just withered away and the polytunnel ones have yet to show any life at all.

And because all the veggies are growing I needed to make some more veg markers. I didn't want to make completely wooden ones for the veggies though because I needed something that would be quick to make and require nothing more than cutting and nailing, plus I wanted whatever I wrote the veggie name on to be weather proof so here's what I came up with


Granted they're not the most stunning of markers but they were quick, easy and free to make. All I did was cut that wood to the length I wanted, cut up an old milk carton to get the plastic I wanted then folded the plastic over on top and nailed it to the wood


I'll make the more ornamental ones I posted about HERE for the garden plants or plants that are in tubs.

Monday 15 April 2013

Plans are afoot!

I've spent a fair bit of my free time over the last few days absorbing as much information as I can from Rachel Mathews free workshops and her blog and I finally have a finished plan of what the garden will look like once we've finished the major landscaping. It's a basic plan but it's a plan all the same - I'll share it some time soon.
My main focus with this garden makeover is that it costs as little as possible and where possible I want to use existing materials. I do not want to buy materials in!
I'm quite lucky because I've hoarded plenty of stuff, we recently aquired 50 or so wooden railway sleepers in varying sizes, we have a huge heap of old stone from the demolished part of the house and we have heaps of old slate, ideal for shovelling into Mr TGs mixer after smashing them to pieces to get the rounder, softer edges.
I have to admit that once I went out there with spade and shovel in hand I became quite overwhelmed with the challenge I had set myself - my plan includes alot of those heavy sleepers and stone!
Once again Mr TG came to the rescue and got me started, in fact what he did in just a couple of hours would have taken me all week but it means I can see where it's going and I suddenly don't feel so overwhelmed by it all.

Here's the first area he started at. The right hand side of the photo needed sleepers bedded down and all those stones & gravel removed to create flower beds.


Crikey I wouldn't even have bothered with a string line, I'd have gone by eye. I am such a lazy gardener!


It really didn't take him long at all to get those first few sleepers in for me and now I can begin to clear the stones etc on the right. There is quite a large area you can't see to the right of the image and it's going to house a large pond which will sit one sleeper higher than the edging sleepers and there will also be a patio area (as it's a sun trap) which will be slighter higher than the pond so that the garden, pond and patio will essentially be 3 levels. Make sense?
Initially I hadn't intended to have a pond here as we have a mini lake round near the polytunnel but we want to get some more Koi and although they thrived for many years in the mini lake an Otter family moved in to the coast just down the road and every other year when the youngsters move away to find their own territory they eat all our fish en route. It took us several years, several stock replenishments and one encounter with an Otter outside this year to realise what was happening.
I also laughed at Mr TG's idea of a patio in that sunny area too because I've always moaned that I needed to plant some of my more tender plants in that area but never could because the house render isn't finished. But the area IS a suntrap as it faces south (Yup I have a lovely South facing garden) and I do find myself sitting there in the summer so in my cunning new plan I have included a patio there but still have loads of planting space for my sun loving plants.


The walkway between the sleepers will eventually have a pergola and climbing Roses.


A view from our bedroom upstairs. The lines to the sleepers that create beds going into the garden are not quite perfect but surprisingly it doesn't bother me. It will be invisible anyway by the time I've crammed plants in. I deliberately chose to have the beds at different lengths too because I didn't want a central walkway going into the next area of the garden.
The area to the bottom of the photo goes back much further than you can see and is where the pond and patio will go


I have ALOT of stone clearing to do before the ground is anywhere near suitable for plants plus Mr TG has to protect those drains first.

But first I have to continue with setting in sleepers for beds (or re-setting as the case is in some places) and if you imagine you're standing in the new area where I said I was building a pergola THIS is what you're faced with


Not pretty is it! And my plan had to incorporate both of the aviaries even though they're due for rebuilding.
All the sleepers have to come out and be re-set and most of the plants on the right hand side will be coming out so that the ground there can be improved (it's simply full of Aquilegia) and those washing posts have to be set elsewhere.
Plus all  the exposed fencing (this view shows the North/East direction) has to be sheltered in some way because those winds rip through my plants.

A few years ago I would have said that I could get this pretty much finished in 6 months but I'm not quite so nimble as I once was and am packing a few extra pounds too so realistically I haven't set myself a time scale - it takes as long as it takes. I can't devote all of my time to it because I have other areas of the land that need attention too such as the greenhouse and veg beds.
It's certainly a project though!

Friday 12 April 2013

FREE Garden design Workshop Online.

Surely it must have been fate?
I've been moaning about my inability to put a decent garden design down on paper quite a bit lately and although I whipped up a basic scribble on some lined A4 paper last week to save myself from Mr TG's fantastical design, I have to admit that the design process made no sense to me whatsoever. So with that in mind you can imagine my excitement when I was checking out FB and saw a link to 'Successful Garden Design - A FREE garden design workshop', I clicked that link as quick as poop off a shovel and delved straight in to the videos.

If you are interested in re-designing your garden or designing a garden from scratch and have absolutely no clue where to start or no clue as to why all your previous attempts just look bitty or wrong or weird or - like mine - just plain embarrassing then you need to set a little bit of time aside to check out Successful Garden design website.

I never would have thought to use Google maps as a quick and easy way to get a basic garden plot to work from but Rachel shows you how in 'Getting started'.

'Session one'  is a video approx 38 minutes long and within the first 10 minutes Rachel had shown me exactly where I had gone wrong with my design and why none of it flowed - or ever would.

'Session two' is a video approx 36 minutes long and I've yet to watch this one. I'll be doing so probably in the very early hours of the morning though because I need to see it before Mr TG and I hit the garden design in reality tomorrow.

Successful Garden Design  
"I'm Rachel Mathews. I'm a professional garden designer with over 20 years experience. I'm hosting a FREE Garden Design Weekend Workshop online. Come and join me to discover the easy and inexpensive way to landscape your garden and create something you'll really love"
 

You’ll get to see a garden design from beginning to end, with lots of behind the scenes, simple, tips and trick you’ll be able to apply to your own garden.

Here’s What You’ll Learn in the Workshop

  • How to design the perfect garden for your tastes, location and budget from beginning to end.
  • How to avoid the BIGGEST mistake nearly everyone makes with their garden (and how to correct it if you already have)
  • How to create a beautiful garden with a cunning trick that costs virtually nothing
  • How to choose the right landscaping materials for your property and design style
  • How to do a stunning makeover on an existing garden, without spending a fortune
Sign up already and come and join us for the FREE Garden Design Weekend Workshop! Don’t worry, although it’s called a ‘weekend workshop’ it won’t take up your entire weekend. I will show you the most useful garden design techniques, in the shortest amount of time possible, so that you have the rest of the weekend to try them out and action everything you’ve learned.

Go for it, you have nothing to lose and lots to gain!

Thursday 11 April 2013

My DIY wormery

The bitingly cold weather appears to be hanging on here and it doesn't make for a happy gardening experience so yesterday I figured I'd spend the day clearing up jobs in the greenhouse and polytunnel.
Once I got in there though I suddenly had a whim to build a wormery. I've wanted to build a wormery for a while just to see if it composts down those kitchen scraps quicker than my compost heap but it had to be made using items I could salvage from around here (not buying a thing).
I didn't have the tubs I wanted to use last time so gave up on the project, however I now have a surplus of those plastic tubs so I gathered 3 of them and 1 lid and headed off to the greenhouse / workshop.


I decided I wanted the lid to be black instead of clear to absorb a bit of heat in the winter so I gave it a coat of black paint I bought for the indoor log burner.

diy wormery, plastic tub wormery, budget wormery


Next I had to adapt the bottom bin which would be the one used to collect the liquid from the wormy compost. Alot of the tutorials online suggested placing a brick or two in the bottom so that the next tub wouldn't sit all the way down and the liquid end up drowning the poor worms but even if I did own a brick or two, which I don't (have never even seen a brick here in the Highlands) it's not what I wanted to do.
So I decided in my wisdom to screw a square block to two of the internal sides so that the next tub could sit on those - like this

 budget wormery, handmade wormery, DIY project, garden project


I did then realise (when I took the time to actually think the process through) that in my "wisdom" I had actually made the liquid tub no longer watertight - duh!
Oh well, I'll just have to empty it regularly won't I!
As for the actual reality of screwing those blocks on, well let's just say I could have kicked the whole thing over the valley because I made a real meal of it. The main problem being that I wouldn't even allow a 1/4" difference between the two because if both sides didn't sit level it would bug the hell out of me.
With the bottom liquid catching tub done I moved on to the next level. This next tub needed teeny tiny holes drilling in the base to allow all the liquid to drip through to the bottom tub (I'm kinda going on blind faith that the worms won't follow suit) and then I drilled air holes all the way around the top of the tub

 DIY wormery, garden project, garden compost, plastic tub wormery


This second tub then sat niftily on top of those blocks in the bottom tub

 DIY wormery, Garden project, budget wormery


The final top tub then had the same air holes drilled around the top and holes drilled in the base so that the worms can move on up as they need to.

 DIY wormery, budget wormery, plastic tub wormery


With the lid on all I needed to do was add the ingredients and the all important worms.
Research told me that I needed to first put some damp cardboard on the base of the middle tub (hopefully this is designed to stop them pesky worms dropping to their watery death below) followed by some damp shredded paper, then some soil with the worms and finally some kitchen waste.
Once all the layers are in place I then simply put more damp cardboard on top of it all and then stack the third tub (with the lid on top) and then wait for those worms to do their thing!
So, where do I get the worms? I remember when I last got a load of horse manure that it was full of the correct Brandling worms but I've not got any recent manure so what to do? Well apparantly the compost heap is very likely to have some so I donned my Marigolds and plunged my hands into the compost heap.
After 10 minutes of rooting I found nothing! Nada! Not only was there no Brandling worms but there were no worms whatsoever - that can't be good can it?
So my newly built wormery is just sitting there because I refuse to buy blinkin worms. I'm just going to have to go and get a trailer load of manure.
Buying worms!!!! Whoever would think of such a thing! Worms!!!!