Showing posts with label Garden design. Show all posts

Saturday, 16 April 2016

Sleeper raised beds

I don't normally resort to writing lists of jobs to be done but we have so much that needs doing outside that I've had to list them all so that we can prioritise - often it seems that the one job we want to do cannot be done before another is completed to clear the way.

Filling these new raised beds is a case in point. The raised parts are finally finished mostly (the temporary ends need something more permanent) and so they needed filling. Some of it was filled months ago but then it got left as I pondered on all the other jobs that were piling up - a mistake I promised myself we wouldn't make this year.
I have to say there is great satisfaction in finally seeing the raised beds completed and filled with lovely top soil and compost.  We bought the topsoil in last year (or the year before, I forget) but the compost is all free of charge.

Mr TG collected several Hippo bags filled with all the plant material and spent compost from a local department store. Usually they would pay a firm to come in and haul away the bags but I was asked by an employee as to whether they were any good to me. So late last year hubby collected the bags on his trailer and bought them home - with a police escort as it turned out he was littering the entire 15 miles home, oops! I then covered the tops of the bags to allow the contents to rot down over the winter.

These bags contain a huge amount of material and it was pleasant to see that the contents had actually managed to rot down  over winter despite the cold, I was concerned that they wouldn't heat up enough to do so.


We have used this type of compost once before and I had forgotten just how back breaking the work is. Ordinarily I think a person could do this and not suffer any pain but for some reason 5 minutes of this and my back feels like it is broken and I have to rest.
There is a system to this stuff though. I cannot empty it directly onto the beds because the contents not only contain the rotted plant material and spent compost but ID labels get chucked in, sticks go in, cane toppers go in, plant rings are in there and even the odd pot has been thrown in.
This is the current sytem:
  • 3 to 4 shovel fulls go into the barrow. This then has to be hand sifted to remove all the plants that haven't rotted which go straight into the trailer, all the non degradeable stuff goes into a bucket for disposal and all the small weeds etc go into another bucket which again then goes into the trailer. Once the trailer is full I hook it up to the quadbike and it is then driven down the land where the plant material can be shovelled out to rot down.
It's the being bent over the barrow that actually cause the back pain.


This is what a full barrow looks like and each Hippo bag gets us at least 5 of these.


This is one part of the filled raised bed. It's approx 2ft in height so has used alot of top soil and compost.
Excuse the boarding to the left, this is going to be removed as Mr TG builds a wall there to protect the garden from the northerly winds that funnel down here. This means though that the plants I put in the raised bed will all be facing south and in full sun all day - insert smiley face.
These raised beds are to house shrubs to form another windbreak until the wall is built but also to add height and enclose the open garden a little.
I'm not 100% certain of the plant combination but I have alot of Hebe,large hardy Fuschia, Viburnums and Hydranges - this is a large area to fill and will frame the new patio we are going to lay.
Just in front of the raised beds we are adding another line of sleepers to create another smaller raised bed so that we can plant Day Lillies, Crocosmia and Iris.
The back larger raised beds will also contain honeysuckle and climbing roses to mask the aviary which is out of shot of the picture.


Monday, 30 November 2015

Well that was a quick change

Wow, is it ever cold out there lately! What with that and the rain I'm keeping off the garden as much as possible. Thankfully I'd done a fair bit of filling the new sleeper beds with topsoil and compost before the naff weather hit though I do still have a fair bit to go.


Luckily I have plenty more soil available and thanks to my daughter bringing me home about 200 Wallflower plug plants I can fill it up for winter to stop the cats using it as a toilet.

I'm thinking we have a slight land drainage problem


When we first moved here 3 acres or so was completely plastered in awful gorse bush. We wasted way too much time and money trying to clear it without researching the correct way to go about it, this resulted in us simply regenerating new growth. We finally decided to pull all the gorse out with a digger, scrape the whole land with a digger and then literally go round pulling up all the little bits of roots that we could find. We now have land that can be mowed but we still haven't resolved the gorse problem - it really is a tenacious plant that isn't even destroyed by fire - we tried!
We can live with it though because the mowing will prevent it gaining any height and we thought it eould eventually stunt the overall health of whatever was left.
No such luck!


See all that dark green stuff? That's gorse and it's decided that if it can't grow up it will make a lovely prickly carpet instead.

Saturday, 24 October 2015

Garden sleepers and sand cuttings

I've been making the most of the mild weather we've been getting here. It's extremely unusual for the wind to be as absent as it has been for the past few weeks and I dare say we'll soon return to the usual windy conditions but until then I'm making the most of what we have.

I had promised myself that I wouldn't make a start on any more hard landscaping until I had caught up and cleared the rest of the garden which has been neglected all year but I couldn't help myself, I have hundreds of plants waiting to be put into the garden and want it all ready for them in spring. These poor plants have been housed in pots for too many years now and they're beginning to show signs of stress so it's important that I make them a home ready.
With this in mind I decided to build a retaining wall out of old old railway sleepers, these sleepers have seen better days to be honest but I have heaps of them and I needed a retaining bed to add some height for the shrubs I want to plant in there.
I've only managed a small section so far - these things weigh a ton and have to be reinforced at the back to prevent them falling - but once I have them all in place I will board the fences behind the sleepers and then fill them with top soil.

I haven't made the border too wide once it's filled because a) I had to consider the amount it would take to fill and b) I'm only putting shrubs in there.
The ground in front of the sleepers is going to be dug out and curved so that I can plant perennials and then I'll put a decking or patio to the front of that.


The fence to the right of the wall is an aviary so I''l grow some honeysuckle up that but that back fence will eventually be replaced by a solid wall so I have to make sure any soil retaining boards I put up can stand by themselves until the wall is built.
I also have to add approximately another 4 bays of sleepers to the top left as it's a large area.


A job even more tedious than digging in sleepers is the cleaning of this decking. All those small harling chips are well and truly wedged, I tried to convince myself that I didn't care but I couldn't live with the look. Besides the decking needs sanding and re-treating so I have to keep at it a bit every day - it's soooooooo boring.


There are two plants in particular that I have never managed to propagate with any success - Cornus and Philadelphus. I'm not sure what I do wrong, I've followed instructions to the letter and yet no matter what method I have used the years of trying have totalled 1 Cornus and 2 Philadelphus. Last year I tried a technique of shoving cuttings in sand but after I did them I damaged my back and completely forgot about them. When I emptied the bucket though all the now dead cuttings showed obvious root growth so a few months ago I gave it another go.
I basically filled a tub with very damp sand, shoved Cornus and Philadelphus cuttings in, tightly packed, then inserted the tub into a large white bin liner, tied it up and left it.
2 days ago I decided to turn it out and see what had happened, I knew they must have rooted because everything was still alive but I was amazed with the results - out of approx 20 cuttings of each I lost literally only 1 or 2.


Suffice to say I am really happy with the results and will most certainly be doing alot more next year with many other types of plants.
Now I just need to add them to the hundreds of other plants desperately needing to lay down roots in the garden.

Tuesday, 20 October 2015

A day in the autumn garden

I finally have some control back of my garden.
We've had scaffolding around the house of late while Mr TG did all the harling to the house and it meant that I had to watch as my lovely borders got trampled and damaged and the grass was used to store all sorts of buckets, spades, wheelbarrows etc etc.
I had resigned myself to the damage pretty early on in the year and accepted that I wouldn't be able to do much gardening this year other than any structures that I wanted to build.
It's all go, go, go now. While half the house still needs harling the actuall garden area is pretty much finished, the scaffold is down, the base of the house has been cleared and Mr TG even sorted drainage out for me on the grass.
So for the last couple of days I've been taking stock and looking to see what has been damaged beyond all help (just 1 Fuchsia Genii by the looks of it), clearing debris away, digging over the beds and attempting to clear up the decking. All those tiny harling chips have wedged themselves between the decking planks despite us using poly to keep the area clear and it's taking me an age to get them all out.

Despite Autumn being here the weather has been very mild, in fact we've had nicer weather over the lastcouple of weeks then we had all summer - the wind has been non existant which is a very welcome relief as it's usually a constant here.
My garden doesn't have much autumnal colour and literally no winter appeal - something I intend to rectify - so I've been out catching the last of the colour that is hanging on.

I'm not sure what the colour wheel says but I'm thinking that these are two colours that wouldn't necessarily be deliberately put together. I did though and to be honest I quite like the bright orange of the Crocosmia and the pink of the Fuschia 'Tom Thumb'. In fact I like it so much I'm going to do more of it next year.


Another view of that Crocosmia, Fuschia and a blue Hydrangea in the foreground (Zorro).


It's so nice to finally have pretty background walls in the photo and because this is south facing this area is going to be a lovely hot area next year. I've got as much as the clay soil out as I can over the last few years so plenty of things are happy to grow here, including all those in the above pix. I'm hoping to add Cordylines or Palms to this area.


The pond lillies are still flowering away.


This is my favourite Fuschia of all time! I've had this particular one for years, in fact it's the one I slipped a back disc a few years ago trying to pick up and move. This year I've fed it religiously and have spent a ridiculous amount of time dead heading - obviously worth it as it's still flowering like this.
Despite it being my favourite Fuschia I have forgotten the name of it.


Tuesday, 18 August 2015

How to love your garden

I love joining gardening groups on FB, my favourite being 'Friendly gardeners' and this year I've noticed alot more posts from people feeling frusrated with their gardens, whether it be because they don't seem to have the motivation to get out there, they compare their gardens to other peoples and find their own lacking or just because they never seem to be able to get on top of the weeds enough to actually have the time to create new areas.
Over the last few years I've blogged many times about my own lack of motivation, my own frustration that my garden just never looks good enough (in my eyes) and that I've seriously considered just giving the whole thing up and letting it run to seed and do as it will. The problem with that solution was guilt, I felt guilty that I'd considered giving it up, guilty that I wasn't motivated to be out there and guilty that I just couldn't get it to look how I wanted.

I don't know what happened this year but I suddenly have a different outlook on the whole thing - it started when I made a comment on a FB group that I hated my garden, while many people were understanding and going through the same thing so many others were actually quite short, sharp and to the point and comments varied from "Get a grip", "Well I wish I had your garden" to "Think yourself lucky, at least you can get out to do the garden".
It made me think. What was my real issue with the garden? Once I had those questions in my head I decided to find a solution to them and the solutions I came up with really surprised me.
  1. No motivation to weed: So don't! Simple as that, don't do it! One year of no weeding is not going to turn the garden into a jungle of unimaginable horrors and if it does, deal with it next year but for this year don't weed and just see what happens and what grows.
  2. My garden has no appeal to me: Once I'd thought that one through I realised it wasn't that I didn't like my garden it was simply that certain aspects were not what I had envisioned - such as THAT pond. Once I realised this the solution was simple, keep the things I liked and change the things I don't. The pond is now exactly what I had in mind when we began it a few years ago.
  3. My garden is boring: I figured out that the boringness came from a lack of structure which is easily sorted. I won't buy wood for garden structures but I have heaps of pallet wood and scrapwood so I built the gazebo and am building columns for gargoyles to sit on. I've made plans for solar lighting and have garnered enough battens off Mr TG to build another 3 or so obelisks - the ideas are now flowing and with no weeding to do I have the time to do them.
  4. I have too many gardens to cope with: Sounds ridiculous doesn't it - too many gardens lol. But it's true, we have 3 acres here but I have several areas dotted around that need tending - none of them connected so it's all a bit haphazard. The solution was really quite simple - don't worry about fruit and veg in the PT this year, they take too much time to tend and never really produce much. The tunnel now houses tender plants and a few cutting flowers and takes a bit of watering and that's it. The greenhouse area has a garden that was once a masterpiece (as far as I'm concerned) because it was the only garden I had, this year I've adapted the greenhouse (more a shed with extra windows- DIY) for the hens and the garden is their territory - no tending needed. I have another area next to the natural pond that I've been attempting to renovate and make look smart but can never get it to look right, this year I've left it. The weeds are head high but I don't care I just don't look at them when I pass it lol.
  5. Gardening is pointless because no one ever sits in it: This was the easiest solution of them all - get a grip woman! Who cares if no one sits in it, seriously? This year I've taken time to sit in it myself (which I never do) and I've really enjoyed it. A year ago the weeds would have done my nut in they just don't now, all I do is take some scissors cut the flower heads of and go back to my book. Who knew it was so nice to sit in a garden!!!

I think the best thing about this new found garden freedom is that the plants seem to be growing better without my interference. Yes, there's weeds everywhere but they're green so they blend well lol. and let's face it, some of them are prettier than the rest of the plants.
Taking the time to relax in the garden ahs also helped me to watch the garden through the season and see what's working and what isn't - I have alot of Day lillies in the wrong place and are reluctant to flower, roses that aren't getting enough air and are looking mildewy and a Buddleia that isn't looking too healthy due to it's damp position. These are all things I can improve for next year.

St Johns wort? Certainly self seeded whatever it is.


Stag Horns Sumach - despite it's tendency to migrate and sucker everywhere I have wanted one of these for years. I grew this one from seed and was surprised to see it doing so well as I didn't really think it would survive the winter here.


There's Thalicturm in flower in this image of you look close. I grew it from seed and planted them out last year whereby they did nothing! If I'd been weeding this year I would have dragged them out but luckily I didn't weed and they've now flowered. Can't say they do much for me though and certainly won't bother with them again.


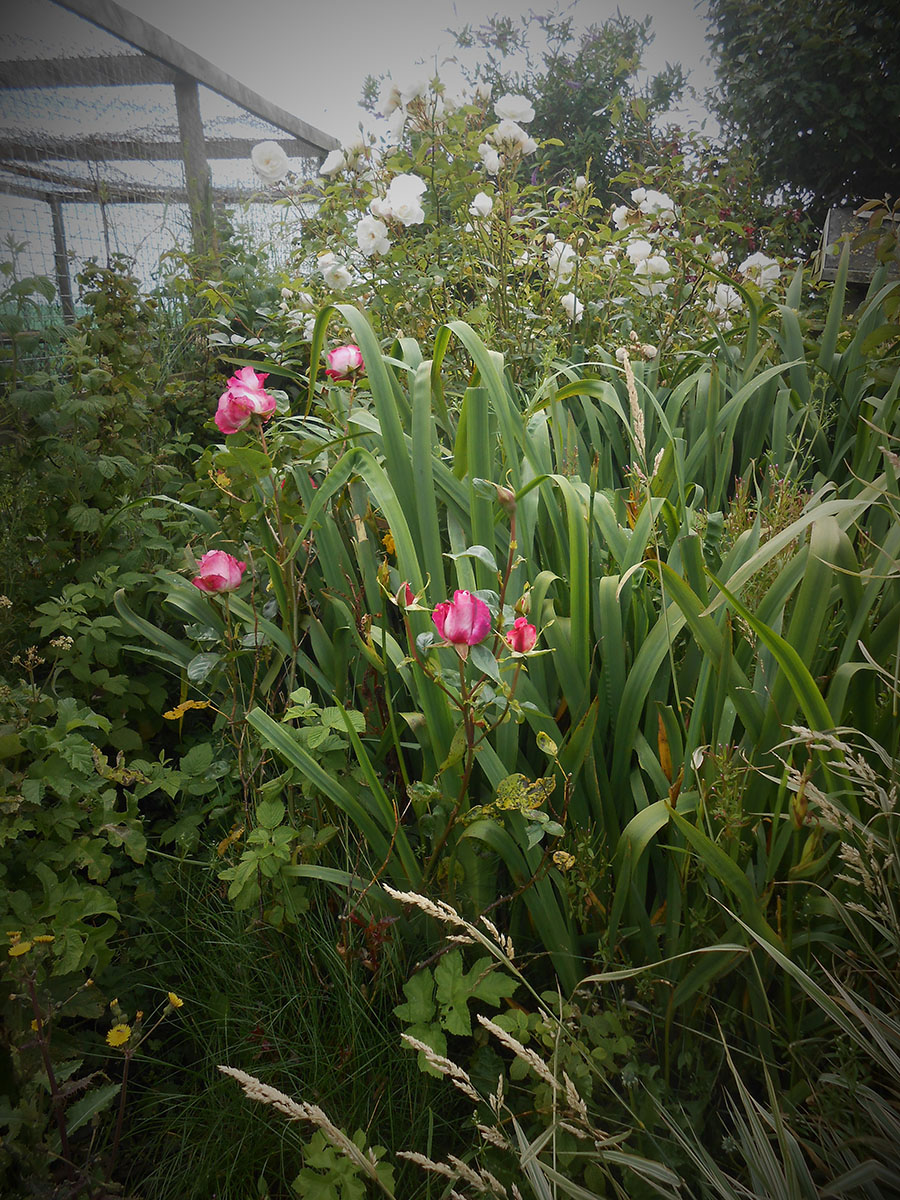
In amongst the weeds Roses bloom. The pink one was due for ripping out this year as it never flowers, now it decides to flower. The white one is my favourite - it doesn't do well after a shower, the blooms rot but it's now about 9ft high and has been plastered with blooms this year.


So lazy have I been this year a wheelbarrow didn't get emptied on the muck heap and not only did I find this Pink growing but also a most amazing poppy and a lovely Lily. Both the lily and the pink will be saved and I'm garnering the seeds from the poppy.


So you see, learning to love your garden doesn't necessarily mean producing the immaculate instant garden that we see on TV. Often times it's about not stressing, accepting your garden as YOUR garden and learning to relax in it. If you really don't fancy gardening this year - don't! It's certainly not going to do you or it any harm and you never know it may just make you fall in love with what you've got all over again.

Tuesday, 4 August 2015

Octagonal pergola and lazy people

This weather continues to astound me. It's now the height of summer and yet I not only needed to wear a thick fleece when I was mowing the lawn on the ride on but I had to have the hood up and tied tightly to keep it there! I have never known summer to be so naff in the 12 years I've lived here - I understand the North East of Scotland is never going to be tropical but seriously, it feels like Autumn right now.
The garden has taken a serious battering and has been neglected for a while now because I've been getting on with building projects instead - weeds can wait lol.

I decided I wanted to build a gazebo as a walk through where the formal part of the garden meets what will be the new unformal part of the garden (once I've done it) but it couldn't be any old gazebo. Me being me I decided to go for an octagonal one and me being me again decided I could mash it together without plans.
The first few attempts were diabolical - I built the panels in the workshop (and even made a mistake on those that still exists because I'm too lazy to change it) and then formed the structure in situ. The problem is I'm one of those people where if there's a quick way and a right way I'll choose the quick way and every time I do that something goes wrong - as it did here.
I just could not get the angles right and couldn't figure out how to do it. In the end I sucked it up and asked Mr TG what I needed to do to get the angles correct, unfortunately this meant doing the job the long slow way and required me to build a square frame and work measurements out - booooooooring!
I have to admit though that the structure went up much quicker and easier once I had the frame to go by and used scaffold poles to hold things in place instead of attempting to hold everything level and drill at the same time - yes, that it how lazy I am.

 Stage 1 - after several attempts at getting these level upright I had a tantrum, pulled them out the ground (even though I had blisters on my hand from digging holes for the spikes) and threw them on the ground. Yes, I had a paddy!! and there they stayed for a few days.


Stage 2 - Mr TG told me how to get the angles correct and how to keep them level while I worked on the structure.


Most of it's up here. It's not perfect but then neither am I so who cares!!
Do you see the mistake on the panels I mentioned earlier? I must have measured 2 of them from one end when putting the cross sections in and two from the other end because two of them have an extra piece at the top - two don't lol.


The tedious job of painting it. I also weeded the bed to the right and planted Bamboo and a climbing rose. The rose is tied to the vertical wires I added to the side gaps as an afterthought.
The bed to the left is in dire need of weeding but it will have to wait.


Gras mowed makes a huge difference. I also completed the base inside the gazebo. It involved loads of cement and plenty of mess - those bricks and shingle are going nowhere!
The bricks sit just proud of the lawn on this side because the ground is lower here and I used the other side as a reference for height. The bricks are level but I will be adding a small step this side so there'll be no tripping over bricks.


I bought the compass slab a few years ago and have never used it until now. Mr TG set it in concrete for me but I didn't realise until it was done that he has the North pointing the wrong way. I did give him instructions as to where it needed to be - everyone here knows the sea is directly south lol- so the North should have pointed just before where the East currently is. Mr TG did offer to rectify it but tbh I like the quirkiness to it now and it's typical of all my projects - there's always something not quite right lol. I like it!


Saturday, 30 May 2015

Garden DIY projects

I'm one of 'those' gardeners that despite having what seems like a hundred unfinished projects on the go I am always on the look out for inspiration for more to do. As a consequence of this I am adicted to 'Pinterest' and sadly can admit to spending a ridiculous amount of time on it most evenings.
The weather here has prevented any kind of gardening for some time now, I can't even mow the lawns as it's too wet and on the days when it's just cold rather than rainy it's just too windy to get motivated.
This has given me time to add to my growing 'Pinterest' folders and I thought that as I have nothing to show from my own garden right now I would post some wonderful garden projects that are cheap and easy to do - I'm all for cheap (preferably free) and easy.

I found these concrete globes on 'the garden glove' along with a fabulous tutorial with 4 different recipes depending on the finished look you prefer. For me it would have to be the pure cement one for 2 reasons - 1) Cheaper - I'm not into buying ingredients if I can help it and 2) I think it would lend itself to spray paint alot nicer than the others.


I came across this next project on 'Creek Tree USA' and they describe these as ceramic hummingbird feeders, obviously I would have no need for that here (though maybe Bee or Butterfly feeders) but I thought they would make the cutest plant supports with very little cost or time.
Pretty door knobs are selling for a couple of pounds for a set of 4 in many of the cheaper stores (none of which I have here) and the right gauge wire would only cost a few pounds too. It would be very easy to attach the wire to the door knobs and voila - no more poked eyes.


Hopefully this year we will be building new pillars at the top gate and I have always wanted to add a Narnia style lamp to the side of them. I did some research on the lamps though and to get the exact one I wanted I wasn't going to get much change from £400, plus the cost of then running electrics up to it. I turned to Pinterest to find an alternative.
This guy, Mark, has come up with the answer for me and I'll definitely be doing it. He's constructed a Narnia style lamp from wood and best of all he's included a solar light to the top so no need for wiring. It may not be the exact style I was looking for but it can easily be adapted to what I want and the guy has even done a video tutoral on it. Check it out on 'Mark's DIY solar lamp post'.

This next project is so simple and obvious yet I never would have thought of it in a million years. I'm always thinking that I wish decking was a bit more comfortable underfoot so I could go outside barefoot in summer, obviously a rug isn't going to last too long out there and will only end up smushy and horrible. Not now!
Laura from 'Design share' has given us a fab tutorial on how to turn a tablecloth into a waterproof patio / decking rug - imagine all the wonderful colour and pattern choices available. This is a definite project for me this year.


I have no lighting in my garden currently - I must be one of the few people who just hasn't got round to it - and so I'd like to start adding a few pieces especially around the patio seating areas. I'm not really into buying the ones on stakes though because I can get a bit OCD about them being perfectly upright but I found this great idea (one of many on Pinterest), unfortunately I cannot find an original link to who created it but the photo speaks for itself - vases, stones and solar lights.


Again I cannot find a direct link to the creator of this next one but I like it so much I wanted to include it. It really is a simple idea and seeing as I have all the ingredients to put it together I will definitely be doing this to add some attraction to my garden. I'm not sure how to do the knot but I'm sure a google search will be productive.


I have plenty of wood scraps laying around, usually I put them in the log shed for winter fuel but now I have seen these I think my garden will instead be plastered with scrap wood animals. I'm not sure whether I want a moose but definitely dogs, horses, hens etc.
'Painted Therapy' provides a good tutorial using a Silhouette Cameo but I think I'd prefer to freehand draw.


Friday, 2 January 2015

Remember the summer

We have had some real mild weather over the christmas period but I've been recovering from a chest infection so haven't been able to really do anything out in the garden despite me raring to get going. I ventured out today with my camera but the snow was falling periodically and I forgot to put the memory card back in the camera so hot footed it back indoors - cold, snowy weather always looks nicer from inside a warm house huh!

My chest infection actually began at the beginning of December pretty much as soon as we landed in Mexico - it was followed by two weeks of struggling to breathe, coughing and an inability to sleep. The infection also kick started a pretty awful asthma condition that flares up during times of a cold or allergies etc etc. Not to be selfish though - I passed it along to our friends that we went away with and they too suffered, my feelings of guilt that I had also ruined our friends holiday was slightly soothed by the fact that said friends are off to the Caribbean again in 3 days - yes, I'm jealous and wish we were going with them. Sseriously though, I did feel bad for them because we had an awful time of it and were actually glad to be going home so I do hope they have a great time in the Dominican Republic.
Anyways I took a few pictures of some of the plants in Mexico - the gardens were kept exceptionally immaculate and the gardeners were working every single day.
Not many were in flower at the time but the greenery was awesome all by itself


 It would be amazing to think that my Oleander would ever grow up to be this size but I doubt very much that it will based on the fact that it's still the 24" it was 3 years ago.

I have no idea what plant these leaves are from but they were huge and I'd love to grow some myself.


I have no idea what all this purple is but Mr TG really liked it and I must admit it certainly had some impact when grown in large areas.


The two together really did look lovely.


The coconut trees shed their coconuts regular and seeing the splatter mess on the concrete paths made me dread to think what damage one could do to a person.


 Here is a Mexican Coati, a member of the Racoon family but it's face is more doglike in my opinion, was amusing to watch them digging grubs out of the grass.


Iguanas were everywhere, often coming out during the day to warm up and would tolerate a person getting really quite close. I always tried not to annoy them but if they got uncomfortable they just scooted back into the hidey hole.


These Racoons (we referred to them as bandits) were a highlight for us, they are so funny to watch and were surprisingly respectful of certain boundaries such as the main dining halls. They had learned what was acceptable and would stay their side of the wall until a scrap was offered. Unfortunately American vacationers didn't understand the fascination of other holidaymakers and were really quite nasty to them, we had to tell a few people to back off and leave them alone - adults and children. I understand that they probably view them as vermin but for many of us they were lovely to see and watch and they really didn't cause an ounce of trouble unless you sat at the snack bar and deliberately encouraged them with scraps. One Racoon quickly turns into 30 when food is on offer and apparantly it can be a tad intimidating. The solution to that problem is quite obvious though really - don't feed them!

These dolphins were a bit of a quandry for me. In my opinion the pool, although large, was not big enough for 5 of them and I felt that the hotel should be making a larger area for them - they certainly have the ground space to do so.
Obviously the hotel makes money from tourists swimming with and learning to train with the dolphins so it was good to see that they were given proper relaxing time and playing time in between jobs - we jokingly referred to this as a policy of the dolphin union.
After 15 mins or so of playing they willingly appeared to return to where they knew they would be needed and they were very very well trained and all handlers appeared to be kind and knowledgable and insisted they were only touched in certain areas (not that I got to touch them but a friend did).
Like I said I have mixed feelings about intelligent mammals such as Dolphins being kept captive and I deliberately avoided going anywhere near the dolphinarium until the last day but I felt much better once I saw how well kept they were and was kind of glad I didn't return without seeing that.


Saturday, 8 November 2014

Garden rejuvenation

It's looking very bland outside now and I'm loving it. It may sound strange for a gardener to admit that but I love, love, love this time of year, not only do I get to prune, chop and tidy everything up ready for next year but I get a better idea of what is right and what is wrong with the garden.
Already I can see that I need more evergreen interest and structure in the garden so this is something I'm going to be getting ready for spring planting - so exciting!
The time has also arrived whereby I can begin to clear and plan the second half of my garden that I was supposed to do this year.
I'm not sure of the actual size of this part of the garden as I'm too lazy to measure it (so you can well imagine how good/reliable my plans are going to be), suffice to say it's pretty big.


Unfortunately I have to carry the theme on from the rest of the garden which is already pretty much finished. I say 'unfortunately' because I made the biggest mistake of designing what was easiest NOT what I wanted, I ended up with straight edges finished with sleepers whereas I love curvy beds where you cannot see what is coming next.

As it stands right now it may not look too daunting but the very far end and side is full of plants and weeds and it's going to take a whole heap of hard work for me to sort it, not least because I first have to remove a ton of gravel and polythene that was laid years ago to supposedly suppress weeds - who knew weeds germinate in gravel.


It's going to take wuite some time to work out what is salvageable in that lot and what isn't.