Showing posts with label Compost. Show all posts

Saturday, 16 April 2016

Sleeper raised beds

I don't normally resort to writing lists of jobs to be done but we have so much that needs doing outside that I've had to list them all so that we can prioritise - often it seems that the one job we want to do cannot be done before another is completed to clear the way.

Filling these new raised beds is a case in point. The raised parts are finally finished mostly (the temporary ends need something more permanent) and so they needed filling. Some of it was filled months ago but then it got left as I pondered on all the other jobs that were piling up - a mistake I promised myself we wouldn't make this year.
I have to say there is great satisfaction in finally seeing the raised beds completed and filled with lovely top soil and compost.  We bought the topsoil in last year (or the year before, I forget) but the compost is all free of charge.

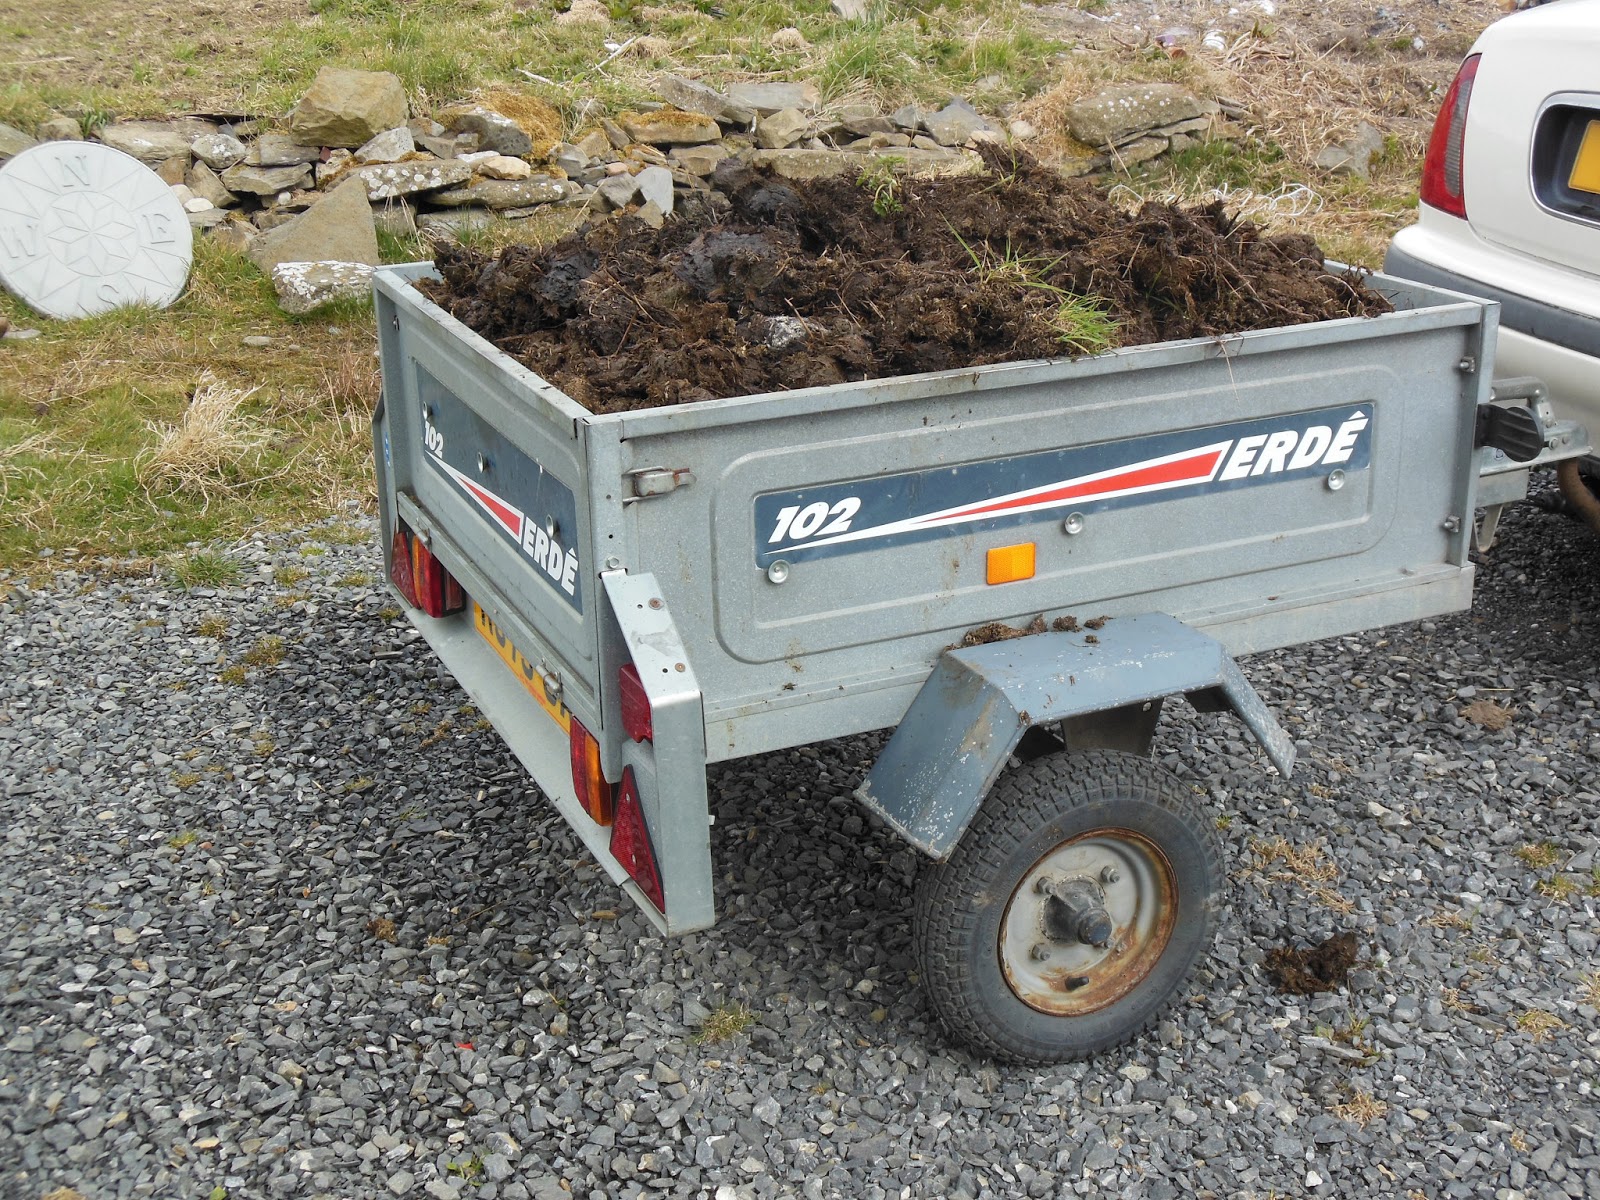
Mr TG collected several Hippo bags filled with all the plant material and spent compost from a local department store. Usually they would pay a firm to come in and haul away the bags but I was asked by an employee as to whether they were any good to me. So late last year hubby collected the bags on his trailer and bought them home - with a police escort as it turned out he was littering the entire 15 miles home, oops! I then covered the tops of the bags to allow the contents to rot down over the winter.

These bags contain a huge amount of material and it was pleasant to see that the contents had actually managed to rot down  over winter despite the cold, I was concerned that they wouldn't heat up enough to do so.


We have used this type of compost once before and I had forgotten just how back breaking the work is. Ordinarily I think a person could do this and not suffer any pain but for some reason 5 minutes of this and my back feels like it is broken and I have to rest.
There is a system to this stuff though. I cannot empty it directly onto the beds because the contents not only contain the rotted plant material and spent compost but ID labels get chucked in, sticks go in, cane toppers go in, plant rings are in there and even the odd pot has been thrown in.
This is the current sytem:
  • 3 to 4 shovel fulls go into the barrow. This then has to be hand sifted to remove all the plants that haven't rotted which go straight into the trailer, all the non degradeable stuff goes into a bucket for disposal and all the small weeds etc go into another bucket which again then goes into the trailer. Once the trailer is full I hook it up to the quadbike and it is then driven down the land where the plant material can be shovelled out to rot down.
It's the being bent over the barrow that actually cause the back pain.


This is what a full barrow looks like and each Hippo bag gets us at least 5 of these.


This is one part of the filled raised bed. It's approx 2ft in height so has used alot of top soil and compost.
Excuse the boarding to the left, this is going to be removed as Mr TG builds a wall there to protect the garden from the northerly winds that funnel down here. This means though that the plants I put in the raised bed will all be facing south and in full sun all day - insert smiley face.
These raised beds are to house shrubs to form another windbreak until the wall is built but also to add height and enclose the open garden a little.
I'm not 100% certain of the plant combination but I have alot of Hebe,large hardy Fuschia, Viburnums and Hydranges - this is a large area to fill and will frame the new patio we are going to lay.
Just in front of the raised beds we are adding another line of sleepers to create another smaller raised bed so that we can plant Day Lillies, Crocosmia and Iris.
The back larger raised beds will also contain honeysuckle and climbing roses to mask the aviary which is out of shot of the picture.


Monday, 27 January 2014

DIY compost and Rose cuttingsDIY compost

I think winter is finally going to show its true colours over the next few days, the weather forecasters are all doom and gloom predicting yet more floods and heavy snow so I don't think there'll be much going on in the garden until spring begins to poke it's head through.
All is not lost though for those of us lucky enough to have some undercover areas such as a greenhouse or a polytunnel to work in.
I sowed Sweetpea the other day, I could never imagine a summer without a continuous supply of this gorgeous flower - so easy to grow and so willing to just keep on blooming. I used seed that I harvested from flowers last year but also threw in a couple of other packets that I bought 2 for £1 in poundstretcher - these cheapie pound shops may be naff when it comes to things such as PVA glue or Sticks like s*** (have experienced both unfortunately) but I've had great results with their seeds and even better results with their bare root plants especially Roses.
I also had another treat from my daughter that works at a local DIY store, it seems 8 Thread Palms were due for the skip and I was offered them first. I have no clue what I am goiong to do with 8 of these

Thread Palm
which apparently could grow to an eventual height and spread of 25m x 2.5m. The description suggests that they are tolerant of salty and windy conditions which they will definitely suffer from here but they need winter protection and that's where the problem will occur once they get to any decent size - I'm not one for going out and fleecing things over in winter but I'm guessing I'm going to have to get used to the notion that it's going to become a necessity.

Another job this week was emptying the compost bays into the polytunnel beds ready for this years veg. I didn't think there would be much of any quality to be honest because I've never really been able to produce much more than dry unrotted stuff or sludge. I got a little bit of decent stuff last year but figured it was a fluke however this year I was happily surprised to find that it was good stuff again.
It may look a bit lumpy but once I'd sifted through it it really was good stuff and I got plenty enough to fill all my PT beds.

DIY compost

Now all I need to so is source some well rotted manure for my flower beds.

I had a go at taking Rose cuttings in December. I honestly never thought they would take but I figured if just one out of each species made it then I'd have at least a few more free Roses for the pergola and the beds.
I checked on them the other day and was quite surprised to see that all but one of them was already showing signs of new life. I know nothing about Rose propagation as this is my first attempt but these little buds have got to be a good sign right? They certainly weren't there when I planted them

Rose cuttings

Saturday, 15 June 2013

Compost & Comfrey?

There's not much to show in my garden at the moment, don't get me wrong everything is growing rampant but it's that time of year when all I seem to be doing is weeding and tidying every day - oh and feeding every bird in Caithness judging by how much food they're getting through.

Today I tackled the compost heap. Remember the bins I made out of scrap wood a few months ago, well I've been ignoring the compost growing in them because it just never seems to do anything and I was getting a bit cheesed off with it - in fact the last lot of stuff I threw on it even included plastic tags such was my 'the thing doesn't work anyway' attitude.
This morning at 6am I sat and watched my 2 favourite gardening programmes and the first one 'Beechgrove garden' had a snippet about garden compost which got me to thinking I really needed to get my act together and get the hang of getting it right - my garden is so in need of as much as I can produce.
So I watched and listened as Jim McColl  went through all the stuff you can compost as well as the stuff you can't and then he went onto the task of turning it, that is when it dawned on me that I'm still not turning the blinking thing and that's probably why it's not rotting - I'm a lazy gardener have I ever mentioned that?
So one of my tasks today was to turn the heap. Here's the unturned heap - there's actually alot more there than it looks


Unrotted huh! I know it doesn't look much but I still have a tendency to throw stuff that should be composted, plus I lose interest in doing it because it never seems to rot.

Then I turned it and discovered that it was actually rotting but I never see this because I never interact with it - I just leave it and add to it so it never looks rotted.


I've started a new bay now, this one will just be turned regular and covered until it's ready.

The next programme I watched this morning was 'Gardeners world', it's not the same since Geoff Hamilton died and then Alan Titchmarsh leaving but Monty Don is the perfect presenter in my book - I just wish there was more gardening and less gallavanting to be honest.
However, Monty touched on another subject today that I've always wanted to try - Comfrey liquid for feeding plants. I regularly have Seaweed tea to hand but I didn't think I had any comfrey growing anywhere to try comfrey tea. The laugh of that is that I didn't even know what Comfrey looked like so how do I know if I have any - again too lazy to check.
Anyways Monty cut some of his Comfrey plant and it suddenly looked familiar, I'm sure I have some of that growing on the land, so I took a couple of pictures.

Is this Comfrey people?
If it is then not only do I have some growing but I have heeeeeeaps of the stuff - how did I ever miss it! Assuming it is Comfrey of course?


I'm keeping my fingers crossed that someone can tell me it is indeed Comfrey.

The smell in the polytunnel is getting more gorgeous by the day, not only are the Lilys and Pinks in flower now but the Sweetpea is too - what an awesome collection.


I'm not sure what the White one is called. I usually keep all the names somewhere safe but for some reason I haven't with the Pinks. They were a special offer from Gardeners World magazine last year where I just paid p&p for a fair few different ones but I can't for the life of me find where I recorded the names.

Saturday, 27 April 2013

Manure and worms, what could be better!

I have decided to stop whinging about the weather! I've come to the conclusion that it is what it is, I have no control over it so  I just need to work with it.
What made me come to that conclusion? Well, yet again today I watched the weather forecast on TV and planned my day accordingly. It wasn't supposed to be terribly warm today but we were assured of a dry day with a little breeze, this means conditions would be perfect for me to get out and dig some more of that clay soil over after last nights downpour. With the washing loaded onto the line outside I donned the boots and got ready. As soon as I got outside the heavens opened and we got hit with hail stones! I sheltered in the greenhouse and fed the birds while I waited for it to pass and waited and waited and waited. Looks like today is cold, windy and chucking hail stones at us - I give up caring!

Anyways yesterday (another day similar to today) I got my daughter out of her pit at 6am to come running with me (didn't go down too well) and after our brisk exercise I roped her into coming with me to get a trailer load of manure - yes, I finally get some of those worms.


One trailer load of that went nowhere so today Mr TG roped in my daughter and her boyfriend (at 7am lmao) and we took his 14ft trailer and filled it to the gunnels with manure, should be enough for quite a while and as an added surprise I'm pulling out all sorts of bulbs from it at the moment, mainly Daffs and Tulips but it's gonna be exciting to see them next year.
The manure is extremely well rotted as it's been in a heap for a few years so I delved in with gloved hands and started pulling out those worms. To be honest I haven't a clue what makes one worm different from another but apparently the common garden worm is no good because it can't stand the conditions of a wormery - I needed specific worms. So assuming the worms found in that muck are the correct worms I got my wormery going.
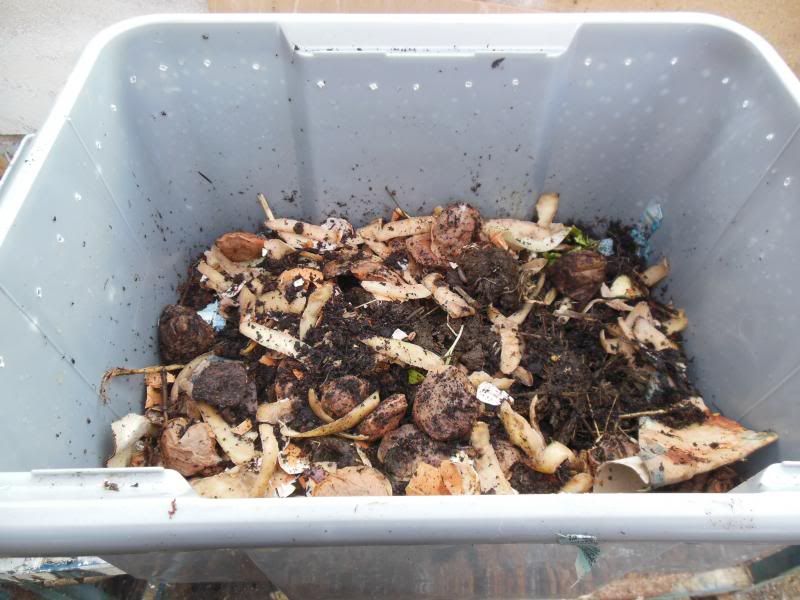
I've read many wormery articles on the net and all the different advice got mushed up in my already mushed up brain so I figured I'll do what I think is right and I'll soon learn if it's not. With that in mind I lay damp cardboard on the bottom of the middle bin, added damp shredded paper followed by a little garden compost then the worms then some kitchen scraps and finally damp cardboard to keep the little critters underneath and working away all topped off with the lid.
Here's the inside before the cardboard top layer


I'll let you know how it goes.

Onto a more exciting note the Silkie hen is sitting on eggs for the first time this year. Silkies make fabulous brooders and it's all this one seems to want to do. We've had a few chicks hatch but because we've left the rearing to the hen only 2 have survived past a few days old and even those 2 came close to death once. This time we'll let her sit on them and hatch them but then we'll take them and rear them.
Silkies really don't have much interest to me because they're more a pretty bird than anything else and their eggs are pretty pathetic, but we'll sell the chicks once they're old enough and then next time she gets broody I'm going to swap her eggs for some of the laying hens eggs and see if she's successful at hatching them. Granted the chicks will have a Silkie father but I'm hoping that's as far as the resemblance goes - I have no idea about these things.


She will not move off those eggs for anything!


Thursday, 11 April 2013

My DIY wormery

The bitingly cold weather appears to be hanging on here and it doesn't make for a happy gardening experience so yesterday I figured I'd spend the day clearing up jobs in the greenhouse and polytunnel.
Once I got in there though I suddenly had a whim to build a wormery. I've wanted to build a wormery for a while just to see if it composts down those kitchen scraps quicker than my compost heap but it had to be made using items I could salvage from around here (not buying a thing).
I didn't have the tubs I wanted to use last time so gave up on the project, however I now have a surplus of those plastic tubs so I gathered 3 of them and 1 lid and headed off to the greenhouse / workshop.


I decided I wanted the lid to be black instead of clear to absorb a bit of heat in the winter so I gave it a coat of black paint I bought for the indoor log burner.

diy wormery, plastic tub wormery, budget wormery


Next I had to adapt the bottom bin which would be the one used to collect the liquid from the wormy compost. Alot of the tutorials online suggested placing a brick or two in the bottom so that the next tub wouldn't sit all the way down and the liquid end up drowning the poor worms but even if I did own a brick or two, which I don't (have never even seen a brick here in the Highlands) it's not what I wanted to do.
So I decided in my wisdom to screw a square block to two of the internal sides so that the next tub could sit on those - like this

 budget wormery, handmade wormery, DIY project, garden project


I did then realise (when I took the time to actually think the process through) that in my "wisdom" I had actually made the liquid tub no longer watertight - duh!
Oh well, I'll just have to empty it regularly won't I!
As for the actual reality of screwing those blocks on, well let's just say I could have kicked the whole thing over the valley because I made a real meal of it. The main problem being that I wouldn't even allow a 1/4" difference between the two because if both sides didn't sit level it would bug the hell out of me.
With the bottom liquid catching tub done I moved on to the next level. This next tub needed teeny tiny holes drilling in the base to allow all the liquid to drip through to the bottom tub (I'm kinda going on blind faith that the worms won't follow suit) and then I drilled air holes all the way around the top of the tub

 DIY wormery, garden project, garden compost, plastic tub wormery


This second tub then sat niftily on top of those blocks in the bottom tub

 DIY wormery, Garden project, budget wormery


The final top tub then had the same air holes drilled around the top and holes drilled in the base so that the worms can move on up as they need to.

 DIY wormery, budget wormery, plastic tub wormery


With the lid on all I needed to do was add the ingredients and the all important worms.
Research told me that I needed to first put some damp cardboard on the base of the middle tub (hopefully this is designed to stop them pesky worms dropping to their watery death below) followed by some damp shredded paper, then some soil with the worms and finally some kitchen waste.
Once all the layers are in place I then simply put more damp cardboard on top of it all and then stack the third tub (with the lid on top) and then wait for those worms to do their thing!
So, where do I get the worms? I remember when I last got a load of horse manure that it was full of the correct Brandling worms but I've not got any recent manure so what to do? Well apparantly the compost heap is very likely to have some so I donned my Marigolds and plunged my hands into the compost heap.
After 10 minutes of rooting I found nothing! Nada! Not only was there no Brandling worms but there were no worms whatsoever - that can't be good can it?
So my newly built wormery is just sitting there because I refuse to buy blinkin worms. I'm just going to have to go and get a trailer load of manure.
Buying worms!!!! Whoever would think of such a thing! Worms!!!!

Saturday, 30 March 2013

What have I started

That's exactly what I was asking screaming at myself this morning.
You see yesterday I decided on a whim that it was the day I was going to build my 3 bay compost area. Originally I was going to build it on a fresh area of land next to the polytunnel but I didnt think I would have all the materials I would have needed to do that and so because I am the sort of person who wants what I want when I want it, I started looking around at what I could adapt to fit.
At first I figured I shouldn't dismantle the plant pot holder I made a few years back out of old pallets


but then I figured 'what the heck', I didn't use it that much last year and anyways it just encourages me to keep stuff in small pots for too long plus the current plastic compost bin is in a bay directly to the right of the pallet pot holder.
So I ripped the whole thing apart!
Well it seemed like a good idea at the time and when I went in last night with an unfinished project on my mind I was quite oblivious as to how awkward the project would prove to be. It wouldn't have been at all awkward if I'd just started the darned thing from scratch but the way I was doing it (making it up as I go along) meant alot of hand sawing and attempting to make the whole thing at least look level (no spirit level was involved - too much hassle when I just want a job 'done').
When I eagerly walked over this morning to continue the job this is what I was faced with


That is so not how I remember leaving it last night.
After alot of jaw gaping and confusion I set to work to get the entire thing finished today. The  thing that makes my projects so unpredictable and messy is that I never ever EVER work from a plan, not even in my head in this instance. I literally made the whole thing up as I went along and finding materials to fit the mess I had created was getting a bit annoying, it has to be said.
Eventually (when I left it this afternoon) it looked like this


It's not finished. I still need to add wooden slats to the two end pallets to keep the compost in (I only got round to doing the middle bay) and I need two more decent pallets for gates but it'll do the job.
Now I'm hoping I can finally get some decent compost going because the stuff I've been making over the last couple of years is pretty naff.
I had a plastic bin in that right hand bay and I emptied it all into the middle bay but after being in the plastic bin for approx 18 months this is what it looked like


Seriously slow at rotting down and absolutely no heat.
I'm hoping the bigger bays combined with better chopping up of materials will get me some of the good stuff. I haven't made lids for the bays so I'm going to keep an eye on them and cover with polythene if I think they need it.