I have decided to stop whinging about the weather! I've come to the conclusion that it is what it is, I have no control over it so I just need to work with it.
What made me come to that conclusion? Well, yet again today I watched the weather forecast on TV and planned my day accordingly. It wasn't supposed to be terribly warm today but we were assured of a dry day with a little breeze, this means conditions would be perfect for me to get out and dig some more of that clay soil over after last nights downpour. With the washing loaded onto the line outside I donned the boots and got ready. As soon as I got outside the heavens opened and we got hit with hail stones! I sheltered in the greenhouse and fed the birds while I waited for it to pass and waited and waited and waited. Looks like today is cold, windy and chucking hail stones at us - I give up caring!
Anyways yesterday (another day similar to today) I got my daughter out of her pit at 6am to come running with me (didn't go down too well) and after our brisk exercise I roped her into coming with me to get a trailer load of manure - yes, I finally get some of those worms.
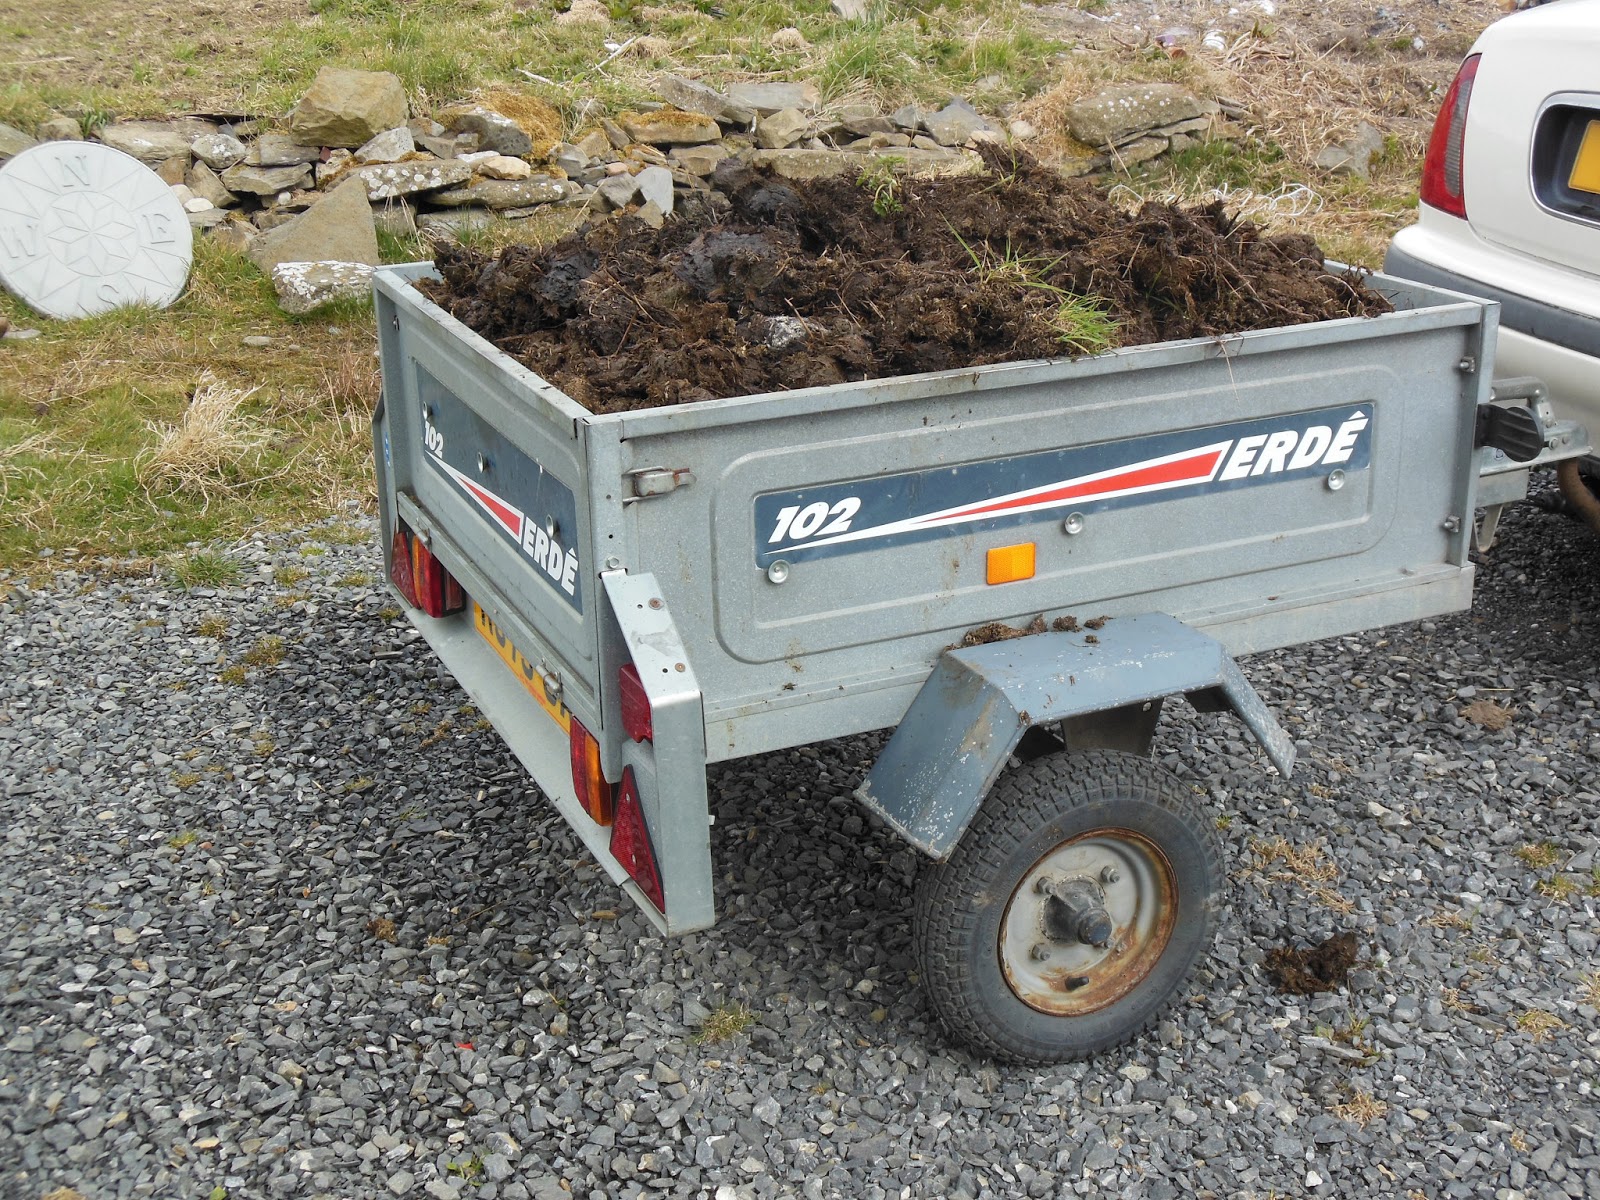
One trailer load of that went nowhere so today Mr TG roped in my daughter and her boyfriend (at 7am lmao) and we took his 14ft trailer and filled it to the gunnels with manure, should be enough for quite a while and as an added surprise I'm pulling out all sorts of bulbs from it at the moment, mainly Daffs and Tulips but it's gonna be exciting to see them next year.
The manure is extremely well rotted as it's been in a heap for a few years so I delved in with gloved hands and started pulling out those worms. To be honest I haven't a clue what makes one worm different from another but apparently the common garden worm is no good because it can't stand the conditions of a wormery - I needed specific worms. So assuming the worms found in that muck are the correct worms I got my wormery going.
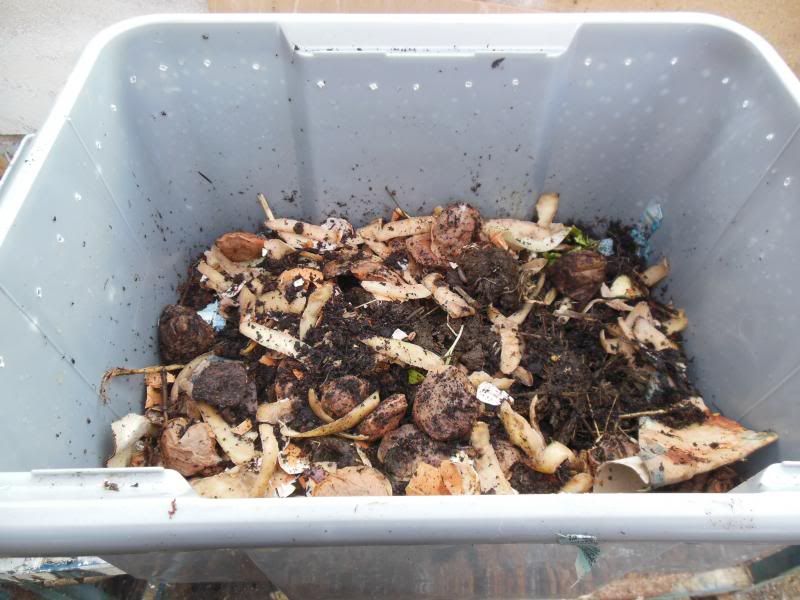
I've read many wormery articles on the net and all the different advice got mushed up in my already mushed up brain so I figured I'll do what I think is right and I'll soon learn if it's not. With that in mind I lay damp cardboard on the bottom of the middle bin, added damp shredded paper followed by a little garden compost then the worms then some kitchen scraps and finally damp cardboard to keep the little critters underneath and working away all topped off with the lid.
Here's the inside before the cardboard top layer
I'll let you know how it goes.
Onto a more exciting note the Silkie hen is sitting on eggs for the first time this year. Silkies make fabulous brooders and it's all this one seems to want to do. We've had a few chicks hatch but because we've left the rearing to the hen only 2 have survived past a few days old and even those 2 came close to death once. This time we'll let her sit on them and hatch them but then we'll take them and rear them.
Silkies really don't have much interest to me because they're more a pretty bird than anything else and their eggs are pretty pathetic, but we'll sell the chicks once they're old enough and then next time she gets broody I'm going to swap her eggs for some of the laying hens eggs and see if she's successful at hatching them. Granted the chicks will have a Silkie father but I'm hoping that's as far as the resemblance goes - I have no idea about these things.
She will not move off those eggs for anything!
Showing posts with label Wormery. Show all posts
Saturday, 27 April 2013
Thursday, 11 April 2013
My DIY wormery
The bitingly cold weather appears to be hanging on here and it doesn't make for a happy gardening experience so yesterday I figured I'd spend the day clearing up jobs in the greenhouse and polytunnel.
Once I got in there though I suddenly had a whim to build a wormery. I've wanted to build a wormery for a while just to see if it composts down those kitchen scraps quicker than my compost heap but it had to be made using items I could salvage from around here (not buying a thing).
I didn't have the tubs I wanted to use last time so gave up on the project, however I now have a surplus of those plastic tubs so I gathered 3 of them and 1 lid and headed off to the greenhouse / workshop.
I decided I wanted the lid to be black instead of clear to absorb a bit of heat in the winter so I gave it a coat of black paint I bought for the indoor log burner.
Next I had to adapt the bottom bin which would be the one used to collect the liquid from the wormy compost. Alot of the tutorials online suggested placing a brick or two in the bottom so that the next tub wouldn't sit all the way down and the liquid end up drowning the poor worms but even if I did own a brick or two, which I don't (have never even seen a brick here in the Highlands) it's not what I wanted to do.
So I decided in my wisdom to screw a square block to two of the internal sides so that the next tub could sit on those - like this
I did then realise (when I took the time to actually think the process through) that in my "wisdom" I had actually made the liquid tub no longer watertight - duh!
Oh well, I'll just have to empty it regularly won't I!
As for the actual reality of screwing those blocks on, well let's just say I could have kicked the whole thing over the valley because I made a real meal of it. The main problem being that I wouldn't even allow a 1/4" difference between the two because if both sides didn't sit level it would bug the hell out of me.
With the bottom liquid catching tub done I moved on to the next level. This next tub needed teeny tiny holes drilling in the base to allow all the liquid to drip through to the bottom tub (I'm kinda going on blind faith that the worms won't follow suit) and then I drilled air holes all the way around the top of the tub
This second tub then sat niftily on top of those blocks in the bottom tub
The final top tub then had the same air holes drilled around the top and holes drilled in the base so that the worms can move on up as they need to.
With the lid on all I needed to do was add the ingredients and the all important worms.
Research told me that I needed to first put some damp cardboard on the base of the middle tub (hopefully this is designed to stop them pesky worms dropping to their watery death below) followed by some damp shredded paper, then some soil with the worms and finally some kitchen waste.
Once all the layers are in place I then simply put more damp cardboard on top of it all and then stack the third tub (with the lid on top) and then wait for those worms to do their thing!
So, where do I get the worms? I remember when I last got a load of horse manure that it was full of the correct Brandling worms but I've not got any recent manure so what to do? Well apparantly the compost heap is very likely to have some so I donned my Marigolds and plunged my hands into the compost heap.
After 10 minutes of rooting I found nothing! Nada! Not only was there no Brandling worms but there were no worms whatsoever - that can't be good can it?
So my newly built wormery is just sitting there because I refuse to buy blinkin worms. I'm just going to have to go and get a trailer load of manure.
Buying worms!!!! Whoever would think of such a thing! Worms!!!!
Once I got in there though I suddenly had a whim to build a wormery. I've wanted to build a wormery for a while just to see if it composts down those kitchen scraps quicker than my compost heap but it had to be made using items I could salvage from around here (not buying a thing).
I didn't have the tubs I wanted to use last time so gave up on the project, however I now have a surplus of those plastic tubs so I gathered 3 of them and 1 lid and headed off to the greenhouse / workshop.
I decided I wanted the lid to be black instead of clear to absorb a bit of heat in the winter so I gave it a coat of black paint I bought for the indoor log burner.
Next I had to adapt the bottom bin which would be the one used to collect the liquid from the wormy compost. Alot of the tutorials online suggested placing a brick or two in the bottom so that the next tub wouldn't sit all the way down and the liquid end up drowning the poor worms but even if I did own a brick or two, which I don't (have never even seen a brick here in the Highlands) it's not what I wanted to do.
So I decided in my wisdom to screw a square block to two of the internal sides so that the next tub could sit on those - like this
I did then realise (when I took the time to actually think the process through) that in my "wisdom" I had actually made the liquid tub no longer watertight - duh!
Oh well, I'll just have to empty it regularly won't I!
As for the actual reality of screwing those blocks on, well let's just say I could have kicked the whole thing over the valley because I made a real meal of it. The main problem being that I wouldn't even allow a 1/4" difference between the two because if both sides didn't sit level it would bug the hell out of me.
With the bottom liquid catching tub done I moved on to the next level. This next tub needed teeny tiny holes drilling in the base to allow all the liquid to drip through to the bottom tub (I'm kinda going on blind faith that the worms won't follow suit) and then I drilled air holes all the way around the top of the tub
This second tub then sat niftily on top of those blocks in the bottom tub
The final top tub then had the same air holes drilled around the top and holes drilled in the base so that the worms can move on up as they need to.
With the lid on all I needed to do was add the ingredients and the all important worms.
Research told me that I needed to first put some damp cardboard on the base of the middle tub (hopefully this is designed to stop them pesky worms dropping to their watery death below) followed by some damp shredded paper, then some soil with the worms and finally some kitchen waste.
Once all the layers are in place I then simply put more damp cardboard on top of it all and then stack the third tub (with the lid on top) and then wait for those worms to do their thing!
So, where do I get the worms? I remember when I last got a load of horse manure that it was full of the correct Brandling worms but I've not got any recent manure so what to do? Well apparantly the compost heap is very likely to have some so I donned my Marigolds and plunged my hands into the compost heap.
After 10 minutes of rooting I found nothing! Nada! Not only was there no Brandling worms but there were no worms whatsoever - that can't be good can it?
So my newly built wormery is just sitting there because I refuse to buy blinkin worms. I'm just going to have to go and get a trailer load of manure.
Buying worms!!!! Whoever would think of such a thing! Worms!!!!
Subscribe to:
Posts (Atom)


